Wednesday, August 10, 2016

Crafting culture? Count me in.

It has become clear that the mathematics of traditional female crafts are hiding in plain sight. One need not look far, but if you want to look far, go ahead - you will still find the math.


A few weeks ago, I crossed paths with Dona Claudia Vega, a local artisan in San Salvador, El Salvador. Claudia is a older women, perhaps in her mid-seventies or older, but her mind is young. She carries herself gracefully and is the type of woman whose wisdom you can feel when she enters the room. Her specialty is weaving.


Claudia arrived at the workshop location with a portable loom, fiber material, and many examples of her work. She had prepared a weaving demonstration for the children attending the workshop. She set up her loom near a stairway, explaining the importance of correct tension to her craft. She told the children that she was only eight years old when her grandmother taught her the craft, and that she was considered an expert by age ten.


As she unpacked her tools and began to weave, she spoke with the children about the process of making. Her hands moved and manipulated the material so naturally and easily, as if she was not even thinking about her actions. In the moment, I remember thinking that the material itself seemed to be an extension of her body. Claudia touched on many familiar ideas, such as the connection with material one develops when using her own hands to make.


Dona Claudia Vega demonstrates her process of making with her weaving loom. 


Claudia also spoke about number. While elaborating about the planning and design stages of her artwork, she stressed the importance of even numbers and groups of four for specific patterns. The artisan must keep track of the count, according to Claudia, and if one does not think about the number, one cannot envision the final product. She also talked about addition and subtraction, with respect to color work.


At the culmination of her demonstration, we told Claudia that we planned to use one of her works for an e-textile project. The material we selected had taken Claudia three days of near-nonstop weaving to create. She mentioned that the artist must be mindful while making, but this was not a challenge for her, for the craft itself is a mindful practice. It is interesting to observe and identify commonalities in material and traditional female crafts cross-culturally. Number, mindfulness, and sense of community arise naturally in conversation again and again.


Claudia explains that number and mindfulness are key to crafting.


Sunday, July 10, 2016

I’m new to the Re-Crafting Math Team.  I’m Angela Caldwell and currently a returning student receiving my BFA in Metals.  I have always been a maker and come from a family of “hands-on” doers.  My Grandma was a piano major in the 20’s here at I.U. and also a beautiful seamstress.  My Great-grandfather was a tailor, my Grandpa a carpenter as well as other family members who were always crafty.  I was also a Montessori art teacher for 14 years and also taught art courses in the community.  It’s exciting to see where my experiences can cross paths with new teaching ideas.

 When I first heard about the Re-Crafting Math project I thought two things – “Why didn’t I learn math this way,” and “I might be just the person they’re looking for.”  I’m one of those women who have math anxiety yet also one of those knitters who can always find a way to “fudge” a project and figure out how to make it work.  I guess I’m doing math then, right?   The concept that working in traditional crafts can teach math without one really knowing it was intriguing. 

While knitting, stopping to think about if and when I’m doing math was a curious task.   At what stage in a pattern is my brain adding, subtracting and possibly doing more complicated equations?  Can math be visual?  Can numbers present themselves in many ways?

In planning ideas for the project, the first idea I had focused on scale.  Using the same yarn, I knit the same number of stitches and the same number of rows using different size needles.  The outcome was pretty obvious but a simple way to show ratio and scale.  I then went on to create triangles, which required adding stitches to my knitting.   I then decreased and mirrored my knitting by turning my triangle into a diamond.  I slowly realized that math was present in most aspects of knitting.

As a jeweler, I liked the idea of making a picture with beads in my knitting.  Graph paper and counting are necessary to accomplish that – more math!  After several attempts at mapping out my design for a simple flower, I was ready to knit.  This project involved quite a bit of focus and counting in order to correctly follow my pattern.  Again, several attempts to stay on track were needed, but finally I was very satisfied when I could look at my knitting, and very clearly see the flower pattern created.


Taking a break from knitting at the moment to work on e-textiles with stitching and embroidery.  We’ll see where that leads me. 

Tuesday, June 28, 2016

Percentage and Factions in Dyeing

When math and textiles are mentioned together I immediately think of dyeing. I decided to take on a series of colors to show how percentages and fractions change the outcome of a color.
First a little about dyes, I used cotton broad cloth with is a very strong cotton that is a bit stiff. Cotton is a cellulous fiber that uses a specific type of dye called fiber reactive dyes. In the lab we use dyes that are mixed with a depth of dye of 1%. The depth of dye helps calculate the amount of dye needed to make a color. Every color is made with a specific percentages. For example .125% will give me a very pale color compared to 6% which will give me a very saturated color. Fabric does have a limit of dye it can soak up, usually I do not go over 8% unless I am working with a color like black or blue. And in my formulas I do go up to 10% a few times.
For this project I chose a pallet of 5 colors, to which I figured out the formulas for. Usually I can look at a color and figure out the color formula, but sometimes I do need some help, so we do have some sample books that have different samples to help figure out a color formula. Of the five colors I then wanted to take each color and go lighter by two shade and them more saturated.


 So if my color was a 2% I would do .5% and 1% for the lighter colors and then 4% and 8% for the more saturated colors. But, percentage is not the only part of color mixing. There are several ways for mixing. I will use green as an example. Yellow plus blue make green, but if you were to mix equal parts of each color you would have a blue with a little bit of a yellow tinge because the blue would take over the yellow. So in order to make green we would have to put more yellow than blue. This could be achieved
   1.     By percentage you would do two different equations with a 6% yellow and a .5% blue which would give you a green, but it would be hard to make it a perfect color.

.06*DWG                                    .005*DWG
_________=                             ___________ =        
     .01                                                 .01


2.      2. We could do it with ratios meaning we already have mixed colors them we do
 2:1 of the mixed color but for this that’s a bit too complicated just to make a green.

3.      So then we get to my favorite way of color mixing with is with parts. To make a perfect Kelly green you would probably do 2-4% of dye and then after you solve the equation take the product and divide it into any number really I usually do 10. And for Kelly green I would do 7 parts yellow and 3 parts blue.
Let’s do 4% and a DWG of 5 (Dry Weight Goods) or how much the fabric weighs while dry

.04*5
_____= 20    then take 20/10=2      2*7= 14ml of yellow dye and 2*3=6 ml of blue
  .01

In order to do samples I like to use mason jars because they are small so I can easily cover the fabric with the water and dye. For Fiber reactive dyes A few things must be done first. 1. You have to do something called mordenting. This allows the fabric to open up for dyeing and it must mordant for 24 hours. After the 24 hour period the dye pot consists of water, a chemical called metaphose, salt and dye. Each ingredient has a specific amount that is calculated with the DWG.


For the dye process first you add the water which is 20*DWG, then add dissolved salt and dissolved metaphose ( both can be dissolved in boiling water) and add to the dye pot then add the dye and stir. The fabric that has been soaked in the mordant is then rinsed and added to the dye pot. It must be stirred or in the case of mason jars shook vigorously for 15-30 minutes. After this Soda ash is then added also dissolved. This product allows the dye to stay in the fabric essentially. A lot of the time your dye pot will change color slightly. Then the pot must be stirred every 5 minutes for one hour. After the hour is must be rinsed thoroughly and put into a soap soak for 10 minutes.  Then all you have to do is let it dry and you’re done. I chose to sew all of my rectangles together to show the gradient between colors but also how different mixes look together.  


Finished Product

Monday, June 13, 2016

Cosplay and the Maker Movement

Here at the Creativity Labs, we're deeply invested in the educational potential of hands-on making and makerspaces. Though, of course, people have made stuff for as long as we've existed, the recent maker movement has been re-valuing personal fabrication over mass production, and has popularized high-tech tools like 3D printers and laser cutters. At the same time, we're seeing the founding of more and more makerspaces, where people gather to use these tools and make/ repair stuff together, both in and out of schools, and for both adults and youth.

Though the maker movement is supposedly about all forms of making, both high- and low-tech, it's the high-tech stuff, like 3D printers, robots, and projects made with microcontrollers like Arduinos that get the most press. Things that light up really grab people's attention!

For a long time, it seemed as if the maker movement and the cosplay community were totally separate, even though cosplay is obviously all about making stuff--whether that's sewing costumes, sculpting props, or styling wigs. I've seen some recent trends, though, that are starting to bring these two communities together, in a way that, I think, is of great benefit to both.

First, cosplayers are gradually starting to open makerspaces of their own. A few weeks ago, I had the immense pleasure to visit Studio Cosplay in the DC area. Initially founded thanks to a successful Kickstarter campaign, this "cosmakerspace," as they call it, contains all the tools you might need in order to make costumes. It has sewing stations, a fabrication area for cutting and sculpting props, a photography corner so folks can get good pictures of their costumes, a well-ventilated room for spray-painting and sanding, and even a room with 3D printers! Studio Cosplay hosts many popular events, such as a pet cosplay contest, a cosplay swap/sell event, and panels and repair booths at conventions. In addition, it offers lessons to those wanting to learn how to improve their skills. Here are some pictures I took while at Studio Cosplay:

The 3D printing room

Fabrication station and the door to the ventilated painting/sanding room

Studio Cosplay is lucky to get a lot of donations, such as these old sewing machines, used cosplay parts and materials, and sewing patterns
Cosplay Kitchen in Pittsburgh, PA is also in the process of opening up its own studio space. The great thing about this trend toward communal spaces for cosplay is that, from the cosplayers I've talked to, cosplay creation tends to be a very solitary affair (though wearing them at conventions is of course very social). A centralized location allows cosplayers to get to know each other, help each other out, learn new skills they never would have attempted on their own, and share special tools that otherwise would be prohibitively expensive. At the same time, it's also beneficial for the maker movement to have new makerspaces where sewing machines play a prominent role, re-valuing the traditionally feminine and dismissed craft of sewing in a way that most consider "cool" and impressive. Cosplay is still a majority-female hobby, too, so this is also a way to acknowledge more women as makers.

A second trend I've noticed is an increasing use of "maker" tech in cosplay. More and more cosplayers are using 3D printers, laser cutters, and other digital fabrication devices to enhance their cosplays. Ohayocon, which I attended in January, had a 3D printing lab in progress throughout the con. A week ago at Colossalcon in Sandusky, OH, there was a 3D modeling class, I spoke with a few cosplayers who use a 3D printer and laser cutter, and I saw more examples of light-up cosplays than I've ever seen before! This burgeoning interest in lighting up costumes is reflected in the increasing number of instructional resources on the matter, such as Kamui Cosplay's Book of Cosplay Lights. Not only does this increase the cosplays' "wow" factor, but it is also sometimes more accurate to the character, and it gives cosplayers a chance to practice using electronics and circuitry skills.

Of course this Glow Cloud from the podcast Welcome to Night Vale should be glowing!

The above were examples of cosplayers taking up ideas from the maker movement. Is the reverse happening too? Is the maker movement starting to acknowledge cosplayers as makers? Fortunately, the answer is yes! A few months ago I saw that the Milwaukee Maker Faire was seeking cosplayers as exhibitors and workshop hosts. Maker tech retailer Adafruit regularly posts about cosplay on its blog. Cosplayers can make some really impressive stuff, so I think it's only fair that they're applauded as the makers they truly are. As for me, I couldn't be happier with this convergence of two of my research interests!

Wednesday, June 8, 2016

Hula Hoop Weaves

Yesterday I found myself in a space filled with fabric scraps and hula hoops. 

Quite the dreamland, if you ask me. 

After work, I trekked up Pittsburgh's historical north side so that I could engage in a craft workshop at City of Asylum. The creative hub, which functions as a safe space for literary writers seeking asylum, hosted an outdoor weaving workshop for crafters of all skill levels. 

As I entered the space, I was happy to find mismatched materials and fabric scraps strewn about. 

"Comfort," I thought. 

Eclectic fabrics - my favorite! 
The delightfully haphazard practice of laying out all materials available seems to percolate in crafting communities, and as such, I have become very familiar with the organized chaos. However, I also noticed a pile of hula hoops in the middle of the space, and I wondered if maybe - just maybe - I had misread the website and this was actually the Weaving Workout, not the Weaving Workshop (we can all imagine the resultant blog post that would have been the product of that special opportunity).

Before I had time to get too worried, the workshop designers from Contemporary Craft began to explain the process of making. All crafters were instructed to pick up several handfuls of fabric scraps and one hula hoop. Luckily, the project was conceptualized through a blend of familiar terms: weaving terms, like warp and weft, and bike terms, such as "spokes on a wheel". We were told that we would be creating small rugs out of the fabric scraps.

In weaving, the warp threads are held tensely in place on the loom, and the weft threads interact with the warp through over-under movement.


The weft threads move over-under-over-under, while the warp threads stay put.

To begin, we put together our DIY warps by first tying long fabric scrap across the hula hoops. The resulting figure resembled a bicycle wheel. It was important to note that the warp needs to have an odd number of threads - or in this case, fabric - because over-under pattern of the weft needs to alternate with each new row. To create an odd number, we tied one extra scrap of fabric to the middle of our "wheel" and attached the other end to the hula hoop.


The workshop designers from Contemporary Craft explain how to create the warp.

Once the warps were crafted, we learned that the fabrics of the warp would be hidden by the colors of the weft. I wish I would have know this from the start. I would not have spent so much time picking out the funkiest scraps for the "spokes". The workshop designers warned us to be weary of how tightly we pulled the fabric pieces of the weft. If pulled too tightly, we may produce loose baskets instead of rugs. Greater tension would lead to a more intensely three-dimensional piece.

As we began to move the weft fabrics over and under the pieces of the warp, I noticed that the crafting space became much quieter. The chatter dimmed and conversations became less linear. Why? I am not sure, but based on my own experiences and prior crafting projects, the movement of the hands-on craft tends to be quite mindful and it can be easy to get swept up in the emergence of unplanned patterns. Though our finished pieces were small, it is possible to make these woven rugs on a much larger scale.


Hannah, the City of Asylum workshop organizer, ties the last piece of her warp.


Saturday, May 21, 2016

Combined Cosplay: Elsa, Princess of the Fire Nation!

I've written before about the most complex cosplay I've made to date: a fiery version of Elsa from Frozen. In that post, though, I had not yet finished the costume nor achieved my ultimate goal of combining the Elsa costume with Zuko from Avatar: The Last Airbender. This combo translates to a dark-haired Elsa dressed in fire colors, with Zuko's scar and Fire Nation accessories.

I got the idea from a combined cosplay workshop I attended at the Anime Central convention in Chicago last year, in which we were encouraged to design unconventional cosplay ideas that would change up the typical "canon accurate" cosplay formula. Even though Elsa has the grace of a snowy day, while Zuko has a short, fiery temper, I feel these two characters are similar. Both start their stories as heirs to their country's throne, both are older siblings (like me), both feel burdened by their parents' expectations, and both lack confidence and a sense of belonging. In the end, both embrace their powers and inherent worth, both gain the inner strength needed to help defeat the bad guys, and both end up as well-loved monarchs (bonus: fire colors match my own olive complexion better than Elsa's icy pastels!). And as of my last Google image search, no one else appears to have done this costume concept before (or if they have, they haven't put it online), so it's original!

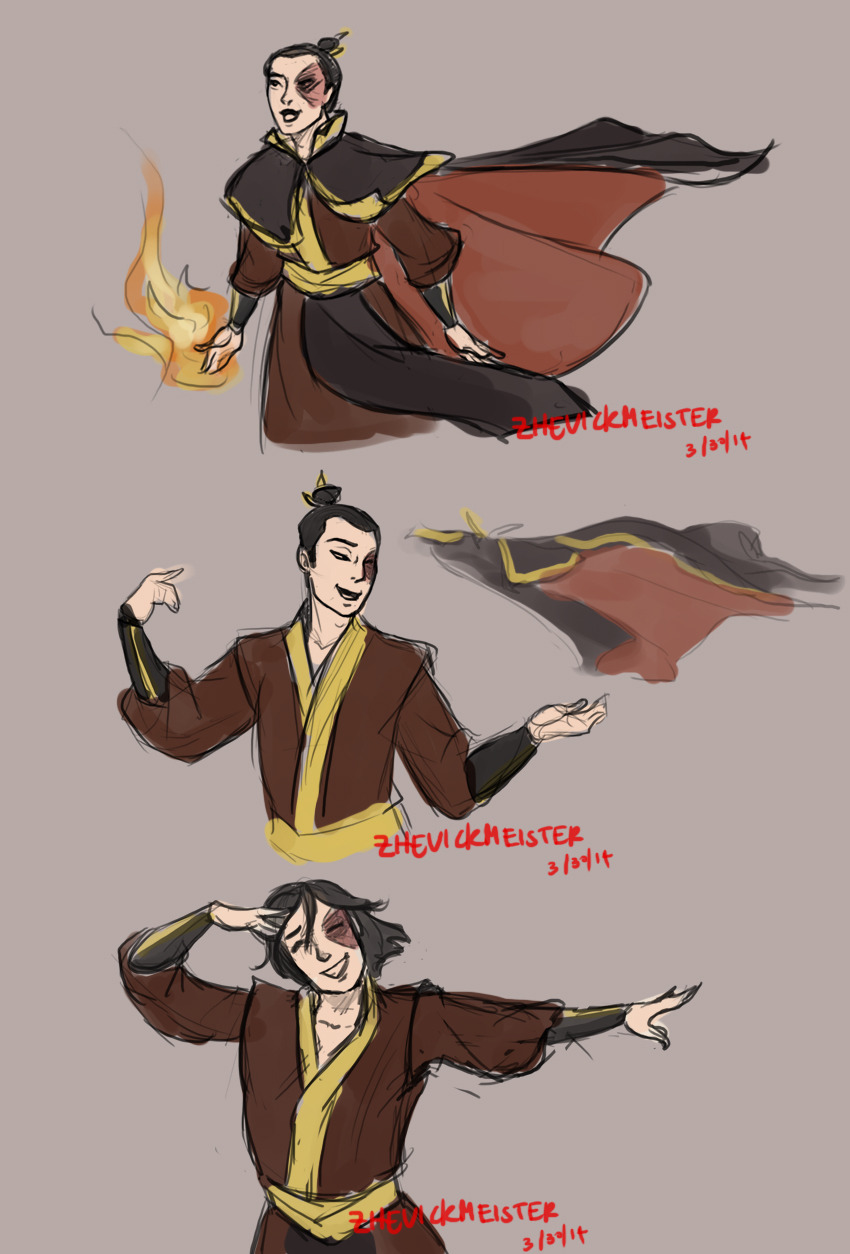
This fanart from zhevickmeister of Zuko "letting it go" is the closest thing I found to an Elsa-Zuko online.

As I reported in the prior post, I wore the costume for the first time at Con-Alt-Delete, where I didn't yet have all the Zuko accoutrements and just went as a Fire Elsa. Since then, I've worn the complete costume at three more cons! Feedback from fellow con-goers has been overwhelmingly positive, though I almost always have to tell people who I'm supposed to be. Here's a picture of my cape/ the back of the costume (i.e., the prettiest part):

Note, also, the scar makeup around my eye, the Fire Nation crown, the Fire Nation symbols in my hair, and the gold-sequined "embroidery" of the Fire Nation symbol on my sleeves!

I was wondering how I would feel wearing this costume, considering that it combines both a male and a female character. Well, firstly, the positive responses from other con-goers made me feel super proud and happy! And the costume itself (as usual) seemed to imbue its own inherent sense of confidence, because I strolled through the halls of Ohayocon in Columbus, OH singing a Zuko-relevant remix I wrote of Elsa's song Let It Go. In public! I never would have had the courage to do that normally! (It also helped that it was so crowded that I don't think anyone heard me besides my friends) But as for the gendered aspects--in this case represented by whether I was acting more like Elsa or more like Zuko--it interestingly depended on a prop.

Ohayocon in January 2016 was the first time I wore the complete Elsa-Zuko getup. I did not have a flame-shaped prop to wear on my hand at that point. I posed for most of my pictures in this manner:


It looks a lot like Elsa's signature pose where she's conjuring a snowflake, right? And that pose was what I felt most comfortable doing at the time, nice and subdued and non-threatening.

However, I wished I had something that looked like a flame to "conjure!" So I set a challenge for myself to add some tech to this cosplay by laser-cutting a flame shape and lighting it up with EL wire. With help from folks at Bloominglabs, our local makerspace, I got the EL wire working and was now able to "firebend"!


Interestingly, I now started posing like this:

Unfortunately the flame was briefly not lighting up at this con. Credit for the professional-quality photo goes to PixieLight Photo!
Note the fierce snarl and aggression in my stance. This is much more Zuko-like than my previous flame-less poses, because firebending in Avatar usually involves flames coming out of a punching fist. This clashes greatly with my usually even-tempered disposition. Like Kylo Ren's mask, this flame prop seemed to make all the difference in giving me the confidence to act differently from my usual self. And it was a lot of fun pretending to punch fire everywhere! At one con, I even played with my friends' young daughters, who were "cosplaying" (in store-bought dress-up dresses) as Elsa and Anna. I would "hurl my fire" at them, and they would "defeat" me, over and over again, with their "powers." I think this speaks to the way cosplay taps into the inner child in all of us, recovering that sense of delight in play that seems to be lost as we grow older.

I'm planning to wear the Fire Elsa dress one more time, this time at a con where all my friends will be dressing up as personifications of websites like Twitter and Youtube. I decided to use this dress to represent the browser Firefox. I will use different props this time, including fox ears and tail, a glowing blue globe like in the Firefox logo, and a red and yellow wig. It will be interesting to see how these different props and group dynamics will inspire me to act!

Saturday, May 7, 2016

Making Knit-Waves: The Seafoam Stitch

A few weeks ago I went on a bike-adventure-turned-misadventure: my chain broke, the bike shop nearby was closed, and a rain-snow mixture was pelting down on the streets of Pittsburgh. This situation could have become very stressful very quickly, but thankfully, I happened to be carrying a skein of yarn and a pair of needles in my backpack. Once again -> Knitting to the rescue!

I jumped between puddles and landed in the Beehive, a corner coffee shop on the southside of the city. As I slowly settled in the comfy coffee-scented space, I realized that this was a prime opportunity to scroll through Ravelry. I was not going anywhere anytime soon, so it was just fine if I got lost in the endless pages of beautiful and interesting knit patterns.

How do I choose a new pattern?

At this point in my knitting path, there are still so many stitches and patterns that I have not made yet. However, I am more draw to patterns that I cannot figure out simply by looking at the picture. For example, I know how to identify ribbing. To make ribbed knit stitches, the knitter knits two stitches then purls two stitches (K2P2) for the desired length. Although I like the way ribbed stitches look and feel, this is not challenging for me.

In a nutshell: I currently choose patterns based on my inability to figure them out with the naked eye. The presence of the challenge drives the motivation to make.

So there I sat, allowing myself to sink deeper and deeper into the ocean of Ravelry patterns when something caught my eye: Ali Green's Seafoam Scarf pattern. I stared at the picture for a minute.

How did she make those interesting loops?


Ali Green's Seafoam Stitch pattern. 


I had no clue, which is why I decided to cast on and get started.

As usual, it took me a few knits and tinks to understand what was going on in the pattern (like I've mentioned before, so much of the learning happens through doing and then undoing). I realized that the pattern is rooted in sets of 10 stitches. This means that the knitter can choose the width of the piece, as long as groups of 10 are maintained. Here, I followed her pattern and chose to work with a total of 30 stitches.

The cast on and first rows of my own rainy day seafoam stitch project.


Much to my delight, I soon found that the pattern consists entirely of knit stitches and yarn overs (YO). Have you ever heard knitters talk about the meditative nature of the craft? This is definitely a pattern that can become meditative, as the absence of purl stitches allows the knitter to keep a repetitive flow of movement.

As a side note: I have become much more aware of texture as my knitting journey progresses. The seafoam stitch creates an extremely comfortable texture because the intentionally-dropped YOs give the wearer a maximum range of movement without disrupting the aesthetic of the piece. 

The texture of the seafoam stitch is the result of a lovely blend of form and function.


I carried this project with me for several weeks. Eventually, I ran out of red yarn and only then did I realize that I had not planned how to finish the piece. After I bound off, I was left with a very short scarf - something made for a kiddo. For the first time, I decided to stitch the ends together with a needle and a bit of thread to make a cowl. Admittedly, this felt a little bit like cheating, as I completely bypassed the complexity of knitting the round, but what can I say? Sometime's you've just got to roll with the (knitted) waves.


The finished seafoam stitch cowl.